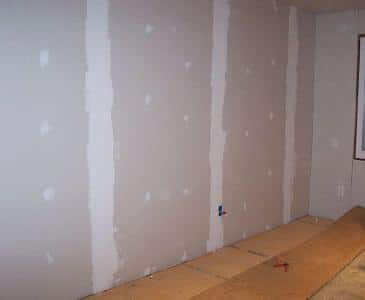
Unless your house is made entirely of brick, wood, or stone, chances are that you’ve got drywall somewhere in your home.
Drywall is used in both ceilings and walls in most new construction. It’s inexpensive, not difficult to install, easy to paint, lasts for years, and is attractive when finished.
Even the best-installed drywall can need replacing for any number of reasons – water damage, picture hanging accidents, or tearing out old walls for renovation are just a few possibilities!
Learn how to install – or ‘hang’ – drywall like a pro!
How to Install Drywall
Depending on the amount to hang, drywall installation can be as quick as an afternoon project. While you can hang drywall solo, it’s always helpful to have a second pair of hands around! This guide assumes that you have already removed the old drywall.
- Drywall sheets
- Drywall drill
- Drywall screws
- Drywall saw or utility knife
- Measuring tape
- Ladder or stepladder (if applicable)
- Stilts (if applicable)
- Drywall dolly
- T-Square
- Adhesive
- Mesh or paper tape
- Drywall compound
- Drywall knife
Method:
- First, make sure that the insulation, wiring, and piping behind the old drywall is in good shape and does not need repairs or replacement. Add drywall backers if needed at this point.
- Estimate the amount of drywall you need by adding up the total surface area and dividing by square feet per sheet.
- Measure and cut the new drywall to the size needed, using a T-square to make sure your cut is straight.
- Carefully measure and mark the location of any outlets or wall switches, and pre-cut them before putting up your drywall sheets.
- Install ceiling drywall first, then wall drywall second if applicable.
- Apply adhesive to the wall studs immediately before putting up the drywall.
- Start your installation from the corner of the ceiling. If you aren’t installing ceilings, start from the top corner of the wall and work your way across and down. Install ceilings flush against the wall. For wall-hung drywall, you generally want to leave ½” between the floor and the lowest sheet; a foot lift is helpful to keep the sheet off the floor while you are working.
- Pre-nail the sheets to the ceiling or wall, using as few nails as possible.
- Once you have pre-nailed your drywall and everything looks even, you can screw everything into place.
- When everything is secured to the walls and/or ceiling, it’s time to tape the seams together using mesh or paper tape.
- Spread the first layer of drywall compound over the wall, using a drywall knife (also known as a putty knife) to feather the edges for a smoother surface. It’s OK if the first layer is imperfect; that’s what the second layer is for! Let the first layer dry for at least 24 hours.
- Spread the second layer of drywall compound – sometimes called the ‘fill coat’ – after the first layer has dried.
- Let the second layer dry for 24 hours. When your second layer has dried, you are ready to paint!
Tips:
- Avoid creating a joint at a door or window, as these will likely result in cracks later.
- Don’t force pieces tightly together. Leave about 1/8” of space between the boards to allow for expansion and contraction.
- Avoid overlapping tape in order to create a flat wall surface.
- Remove air bubbles in the tape before the drywall compound has dried. This will help make your wall flat and professional-looking.
How to Select Drywall

Moisture resistance: Installing drywall in a high-moisture room like a bathroom, spa, basement, or garage? Choose ‘green rock’ drywall, which is drywall specifically designed to resist moisture.
Thickness: There are three main thicknesses of drywall, each of which has ideal applications.
- 5/8” – Heavy and soundproof, great for cold climates or simply keeping sound out.
- 1/2” – An all-purpose thickness, and the most common type in homes.
- 1/4” – Usually used to cover existing drywall, and not for installation on its own.
Northside Tool Rental
Whether you’re renovating or replacing broken drywall, you’ll need the right tools for the job. Northside Tool Rental can provide you with the tools you need to complete your home improvement project. Our staff is friendly and knowledgeable, and is more than happy to answer any questions you may have!
We have five locations convenient to the Metro Atlanta area, so contact us today!


