How To Build A Wood Fence
According to poet, Robert Frost, “Good fences make good neighbors.” Whether you want to build a wood fence for privacy or for decoration — it is true that by doing a little planning and effort, your wooden fence will certainly be admired by those living near you.
Fences can be the source of arguments between neighbors. Common disagreements include what kind of fence is being built, where it is being built, and how the fence will be constructed. Before beginning this project, talk to your neighbors about your wish to build a fence and explain your plan or show them a photo of the type of fence you wish to build.
Types of Wood Fences

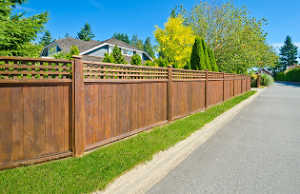
If privacy is your purpose for building a wood fence, a taller, 6-foot stockade style fence will make a good choice. Stockade fences are wood privacy fences. Tall and solid, they keep prying eyes out of your yard. The tops of their boards come to points, making stockade fences’ boards look like longer versions of those found in Gothic-style picket fencing.
Planning Before You Begin Construction
It is advised that you do a few preliminary steps before you start construction.
The first step in preparing to build a wood fence is to know where your property line is located. You should have a survey of your property done to ensure that you are not building on your neighbors property.
The second step to building a wood fence is checking on local building laws. Many areas of the country require a building permit to build a fence. Fence permitting is not universal. Some localities require it, while others don’t. Also, the fence permits may be issued either on the city or county level. This step is important and not to be ignored. Don’t build your fence only to find out that you need to tear it down because you didn’t get the proper a permit to build your wood fence.
Next, contact your local utility company and ask how you can have the power and gas lines in your yard located. Many utility companies offer this as a low or no charge service. Someone will come to your property and mark the locations of these lines so you will not damage power or gas lines when you dig. Again, don’t skip this step. It is important.
Building Your Wood Fence
- Stake the corner locations. Drive stakes into the ground at the corners roughly where you wish your fence to go. It is easiest if the total length of your fence run is divisible by the length of your fence panel. For example, if your fence panels are 8’ in length, it is easier to have a total length divisible by 8.
- Square the corners. Tie string around the stakes and run the string between stakes. Use a square or square-level to make sure that the corners” where our stakes are placed are squared (the two sides form a 90° angle).
- Stake the middle posts. Measure out lengths of 8′ or less along the strings once you’ve square your corners and stake those locations to indicate the location for your support posts.
- Dig the holes. Use an Auger to dig holes at the locations you staked. The posts will need to be buried at least 33% as deep as they are tall (example: an 8′ high fence needs a hole 2.5′ deep), so the hole will need to be at least that depth plus a few extra inches.
- Place your posts. Place 3-4″ of gravel at the bottom of the hole. Place the post in the hole and get it into alignment. Check to make sure that the corners are still square, use a post leveler to make sure it is straight, and make sure it is sitting at the correct height.
- Pour the concrete footing. Carefully holding your post in place, pour in instant concrete until the hole is 2/3 full. Add water to the top and use a stirring stick or small shovel to mix the cement. Prop the post into place (stabilize using temporary nailed boards if necessary) and allow the concrete to set following the manufacturer’s instructions. Fill any remainder of the hole with dirt once the concrete has set.
- Add a builder’s or mason’s line. Pull a builder’s line from one end post to the other, at an equal height above the ground, preferably at the top of the post (if your posts were placed correctly). This will help you keep the height of the fence the same along the way.
- Add on your support boards. Cut 2×4 rails (or horizontal support boards) to the appropriate length to reach between the centers of the posts. If you can, use a single rail for the entire length of the fence section. Rails should be no more than 24″ apart, so most fences will have 2-3 rails. Attach the rails using decking screws.
- Add your wood fence boards. With your support boards in place, you can attach your pickets (vertical boards, also called privacy boards). If you are attaching pre-made wood fence panels secure them with If nailing the boards by hand, use 8d spiral shank galvanized nails or other recommended attachment method.
- Treat the boards. Once you’re done, you will want to treat the boards to increase the longevity of your fence. You can paint your fence, stain it, or simply apply a weather-proofing finish to keep your fence looking great for years to come.


